
Surreal Composite

The steps I took to create this composite are as follows:
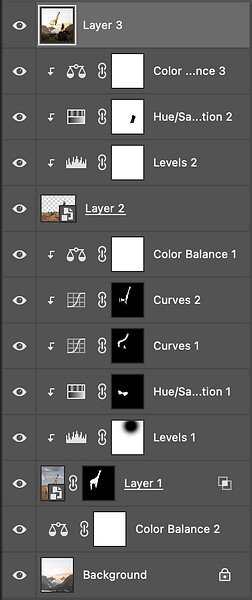
I first opened a new file with the background. Then I placed the Giraffe and used the pen tool to hide the background.
Next, I used Blend If to hide the giraffe's legs. I then used a Levels adjustment layer to make the giraffe match the colors of the background. Following that, I added a hue/saturation layer to further match the color. After that, I added two curves layers to add highlights and shadows. Next I added a color balance to further increase the matching of colors. All of these adjustment layers are set to blend mode: Luminosity. I then opened a separate document to use color range on the second layer to hide the background, and added it to the main document. Next I added Even more adjustment layers to make the second layer match the color of the background. Finally, I pressed Command+Option+Shift+E to make it one layer, and added the camera raw filter.