Jesus Vazquez
Digital Media

Comic Coloring

Based on the learning target, I think my project deserves a 3 as I followed the steps and I understand the process a color stylist uses and the vocabulary.
The steps taken to make this are as follows:
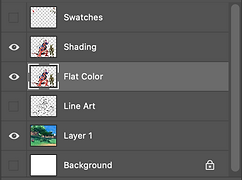
Create a new file in Photoshop. Name it "Comic- Coloring_[Your Name]. Press Create. Drag and drop an image of a coloring book page from online, resize it using Free Transform if needed, and hide the background. Use the magic wand tool to click on white parts outside of the character and delete them. To deselect, go up to "Select" then press "Deselect". Turn off the visibility on the Background layer, then go up to "Layer" and press "Merge visible". This will merge your character's layers. Name the new merged layer "Line art". Name the copy "Flat color". Lock your line art layer. Use the magic wand tool and select places you will color the same color. Go to select, then modify, then Expand by 2-3 pixels (depending on how thick your lines are). Now add your color. Once done coloring, duplicate your flat color layer and name it "Shading". Add an entirely new layer and name it "swatches". Lock your line art and flat color layers. Use the eye dropper tool to sample the color and make a sample on your swatches layer. Make a darker and lighter version. Magic wand on the character on your shading layer. Select, Modify, and Expand by 2-3 pixels. Now add your shading using a soft brush. After you're done shading, turn off visibility on the swatches layer. Find a good picture for your background and drag and drop it into Photoshop. Use free transform to resize it. Move it to the bottom of your layers. If there's still some exposed nothingness, Crop your project to fit the background and characters.